These days there’s a huge variety of smart home devices available, things like smart plugs, smart bulbs, and even smart toasters (why?). If you’ve decided to smarten up your home, it’s easy to end up with half a dozen different platforms and different ways of automating them.
In comes Home Assistant! This is a platform that combines many small projects (called integrations) that are able to control smart home devices either through their respective cloud platforms, or directly over the local network. And makes them available through an interactive web interface. When these integrations connect to smart devices, they generate entities in Home Assistant which allows you to control various parameters.
The upshot of using Home Assistant is the centralized control over all of the smart devices and the ability to create automations that wouldn’t be possible if all the devices were separate.
Another advantage to using Home Assistant is the availability of Android and iOS apps which could make it a direct replacement for existing smart home apps.
User Interface
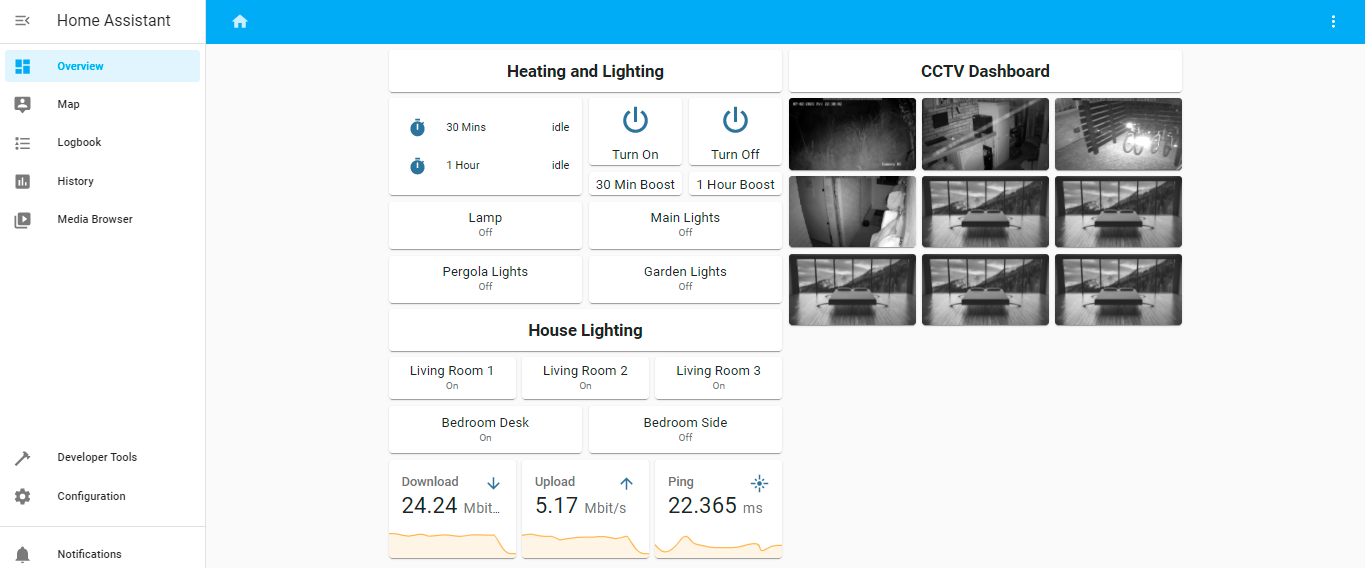
The UI for Home Assistant is based on Google’s angular design which gives it a nice easy-to-use and intuitive feel. HA splits up the interface into dashboards; containing pages, and on the pages are cards, showing entities, so there is certainly enough space for different layouts! This also allows you to make different layouts for different users or devices, which can keep the UI easy to use for everyone. In my experience, the UI seems to be very well maintained by the open-source community and is pretty bug-free.
Use Cases
Because Home Assistant can be configured to do almost anything, the limit is your imagination. Here are a few of my favorite use cases for Home Assistant.
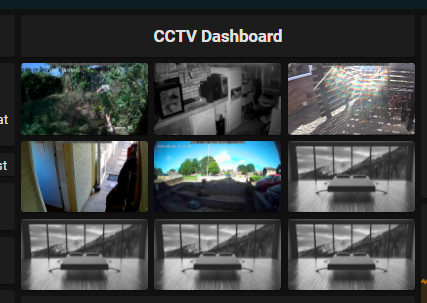
1 – CCTV Dashboard
Using RTSP or Onvif allows you to create a pretty cool-looking CCTV page in Home Assistant. You can change the layout to suit the number of IP cameras you want to monitor or to highlight specific ones.
2 – Electricity Price Monitor
Another way to make use of Home Assistant’s versatile UI is to set up an energy price monitor. This can be done using APIs from a few innovative energy companies (hopefully more providers go this way in the future).
In the image below you can see the current price, last, next, and minimum price of electricity, and because the data is in the form of a sensor, Home Assistant can automatically record and produce graphs from it.
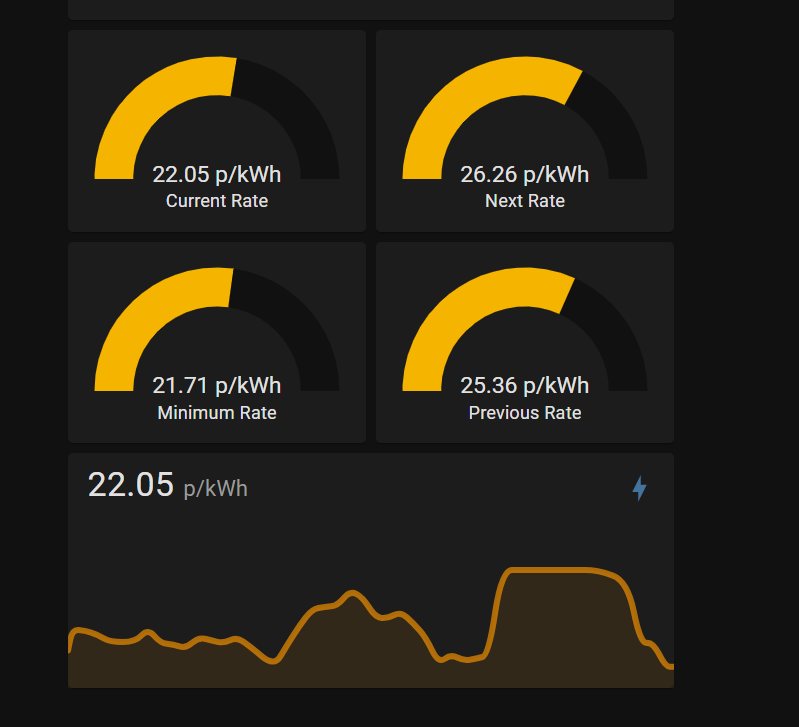
This can be a great way of keeping on top of costs if you are using a dual-rate tariff or pay a different rate every hour. And it’s interesting to see!
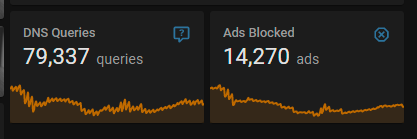
3 – DNS Requests Monitor
This one links in with Pi-hole DNS server and allows you to view the number of DNS queries and ads blocked from your Home Assistant homepage. It’s pretty similar to the electricity monitor since it also uses a sensor to receive and record the data.
Compatibility
One of the big reasons to use Home Assistant is the big user base and thriving development community creating integrations for a huge variety of devices. This helps HA to stay on top of new devices and methods of control and means that the majority of mainstream devices are compatible. In my installation, I’ve mostly used tp-link tapo smart sockets and sonoff smart switches, which are supported, but because they are new products, they do not have integrations but instead plugins. These are still easy to install but are technically not part of Home Assistant.
I also used a number of useful integrations in my installation such as Agent DVR, Tuya, Spotify, Speedtest, and Apple Homekit. Installing these integrations is super-easy as the UI provides a list and search of all of the available integrations.
Home Assistant on Windows
Home Assistant can be installed in a number of different ways for different systems. The easiest method is to install it on a Raspberry Pi using Home Assistant OS. However, I decided to use Home Assistant Core on windows because of how easy it is to edit configuration files.
If you are interested in installing Home Assistant on windows you can check out the very detailed installation instructions on: https://www.home-assistant.io/installation/windows.